Set up SFTP users with restricted access and key authentication
Set up SFTP users with restricted access and key authentication #
Yesterday I've been struggling with how to add SFTP users with key authentication and restricting them to a specific home directory without access to the shell. Here is a little guide how I achieved this. (Linux system running Debian "jessie".)
Add new group and user #
Add Group #
First of all open the /etc/ssh/sshd_config file.
Check if the file contains the following line, otherwise go ahead and add it:
Subsystem sftp internal-sftpAt the very end of the file add the following stanza:
Match Group newgroup
    ChrootDirectory /var/www/projects
    X11Forwarding no
    ForceCommand internal-sftp
    AllowTcpForwarding no
All users having the group newgroup assigned will be restricted to /var/www/projects and they are just allowed to run internal SFTP processes there.
Then you have to add the corresponding group newgroup by executing the following command:
$ groupadd newgroupRestart SSH #
You probably need to restart your ssh service by running:
$ service ssh restart or $ /etc/init.d/ssh restart
After restarting SSH I would strongly recommend to test your log in in a second shell. If something went wrong you still have an open session to fix it.
Add User #
Now you can add the user(s):
$ useradd newuser -s /bin/false -d /home/newuser -g newgroupHere is a short explanation what this means in detail:
-s, --shellthe name of the user's login shell; deny SSH shell access by setting it to/bin/false-d, --homeset the user's home directory-g, --gidset the initial login group
Read more at the Linux man page.
If the user does already exist, you can override the initial login group by running:
$ usermod existinguser -g newgroupOr you can append the group to the user if multiple groups are required:
$ usermod existinguser -a -G newgroup-a, --appendadd the user to the supplementary group(s)-G, --groupsa list of supplementary groups
Learn more at the Linux man page.
One more thing: to be able to login via SSH/SFTP the user needs to have a password assigned or else the account is marked as inactive. It's recommended to have ssh password login disabled, so you won't need the password, it doesn't matter what you choose, but choosing something secure can never hurt.
$ passwd newuserA prompt will ask you twice for a password.
Directories and Permissions #
This part is all about adding the defined and necessary directories and assigning the right permissions to enable SFTP access.
Project Root #
As defined above the chroot directory is set to /var/www/projects. Make sure that this folder exists. Permissions must be set to 755 (execute $ chmod 755 /var/www/projects). Owner and group must be set to root. This is important, it prevents users to traverse from their homes to the other users' directories. If the owner and group differs, execute $ chown root:root /var/www/projects.
It should look like this:
$ ls -lah /var/www
drwxr-xr-x  6 root     root     4.0K May  2 17:00 projects
The SFTP users are not allowed to write to this directory. Therefore you have to create one more directory inside.
$ cd /var/www/projects
$ mkdir project
$ chmod 775 project
$ chown www-data:newgroup project
$ ls -lah
drwxrwxr-x 19 www-data newgroup 4.0K May  3 08:49 project
Assigning such rights allows SFTP users to write to this newly created directory.
User Home #
This is the last thing you have to do, you're almost done.
Change to the /home directory and add a folder for the just created newuser. Inside this directory add a folder named .ssh containing an authorized_keys file and assign permissions as described below.
$ cd /home
$ mkdir -p newuser/.ssh
$ touch newuser/.ssh/authorized_keys
$ chown -R newuser: newuser
$ chmod 700 newuser/.ssh
$ chmod 600 newuser/.ssh/authorized_keys
Now copy the contents of the rsa public key of the user to the authorized_keys file (one line per key). You can run $ cat ~/.ssh/id_rsa_4096.pub on the local machine to get the contents. If the user has no key pair or just a 2048 bit key, I would recommend to generate a new one by executing:
$ ssh-keygen -b 4096 -t rsa -f .ssh/id_rsa_4096You can have more than one key at the same time, this is no problem at all.
Connect via SFTP #
Now it's time to connect via SFTP!
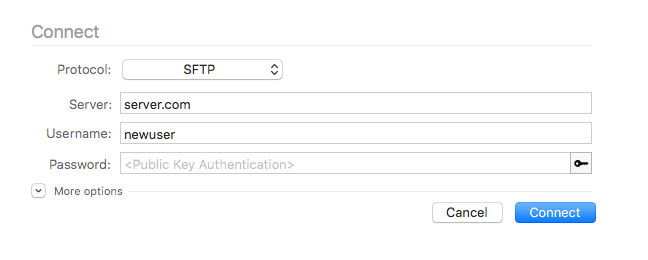
Choose your favorite SFTP client (ForkLift, Transmit, FileZilla, ..) and add a new SFTP connection. Choose Key file as Logon Type (depending on SFTP Client) and select the used private key (.ssh/id_rsa(_4096)).

